


Partington User Manual
ABOUT US
Brought together by our love for cycling, partington.cc strives to design and manufacture the world’s highest performing cycling componentry. Underpinned by quality craftsmanship, and a desire to be at the forefront of innovation, we exist to propel cycling forward. In short, we’re all about uncompromised engineering for uncompromised performance. We believe as a young company, we’ve only touched the surface in terms of innovation. Our minds are brimming with ideas, and leading technology that can drive all aspects of system level bicycle performance.
PREFACE
Congratulations and welcome to the partington.cc family! Thank you for purchasing what we believe to be the world’s most technically advanced cycle wheels in the world today.
This manual provides you with important information regarding the safe use of your wheels and care strategies to ensure you get long and trouble-free service from the wheels. The safety of our customers is of paramount importance to us, so please read and understand this manual fully before installing or riding your wheels. Not observing the information and/or recommendations in the manual could result in a serious or fatal accident. Even the best products can fail if mistreated.
There is a duty of care from the customer to ensure the product is properly maintained, in good condition and used as intended. Please retain the wheel hang tags for future reference, and transfer to new owners where appropriate. If you have any questions after you read this manual, please contact our partington.cc Customer Service Team on contact.us@partington.com.au
Please register your product immediately to ensure warranty protection. If you are a second-hand owner of the product, we still encourage you to register the product, although the warranty will not endure past the standard 2 year warranty period.

The WARNING symbol indicates a hazardous situation which if not avoided, could result in fatal or serious injury
The CAUTION symbol indicates a hazardous situation which if not avoided, could result in serious or minor injury
The NOTICE! symbol indicates a risk of damage to the product.
PERMITTED TIRE SIZES AND PRESSURES
Tubeless system:
- Minimum tyre size:25mm
- Maximum tyre size:34mm
- Maximum tyre pressure: 80psi / 5.5bar / 550kPa
Tube (clincher) system:
- Minimum tyre size:25mm
- Maximum tyre size:34mm
- Maximum tyre pressure:101.5psi / 7bar / 700kPa
The shape of the R-Series rim is aero optimised for 25mm front tyre, paired with 28mm rear tyre, but we identify this size suiting smaller riders. Therefore, recommended tire sizes for R-Series wheels is bracketed by two weight categories:
For riders weighing <70kg (<155lbs) 25mm front tyre, paired with 28mm rear tyre
For riders weighing >70kg (>155ibs) 28mm front tyre, paired with 30mm rear tyre.
Initial tyre pressure set-up guide
front wheel
| tyre size - tubeless | |||||
|---|---|---|---|---|---|
| System weight [kg] | 25c | 28c | 30c | 32c | 34c |
| 50 | 69psi | 57 | |||
| 55 | 71 | 59 | 51 | ||
| 60 | 73 | 61 | 53 | ||
| 65 | 75 | 63 | 55 | ||
| 70 | 77 | 65 | 57 | ||
| 75 | 79 | 67 | 59 | 51 | |
| 80 | 69 | 61 | 53 | ||
| 85 | 71 | 63 | 55 | ||
| 90 | 73 | 65 | 57 | ||
| 95 | 75 | 67 | 59 | 51 | |
| 100 | 77 | 69 | 61 | 53 | |
| 105 | 79 | 71 | 63 | 55 | |
| 110 | 73 | 65 | 57 | ||
| tyre size - clincher | ||||
|---|---|---|---|---|
| 25c | 28c | 30c | 32c | 34c |
| 76 | 63 | 54 | 45 | 36 |
| 78 | 65 | 56 | 47 | 39 |
| 80 | 67 | 58 | 50 | 41 |
| 83 | 69 | 61 | 52 | 43 |
| 85 | 72 | 63 | 54 | 45 |
| 87 | 74 | 65 | 56 | 47 |
| 89 | 76 | 67 | 58 | 50 |
| 91 | 78 | 69 | 61 | 52 |
| 94 | 80 | 72 | 63 | 54 |
| 96 | 83 | 74 | 65 | 56 |
| 98 | 85 | 76 | 67 | 58 |
| 100 | 87 | 78 | 69 | 61 |
| 89 | 80 | 72 | 63 | |
Rear wheel
| tyre size - tubeless | |||||
|---|---|---|---|---|---|
| System weight [kg] | 25c | 28c | 30c | 32c | 34c |
| 50 | 72 | 60 | 52 | ||
| 55 | 74 | 62 | 54 | ||
| 60 | 76 | 64 | 56 | ||
| 65 | 78 | 66 | 58 | 50 | |
| 70 | 80 | 68 | 60 | 52 | |
| 75 | 70 | 62 | 54 | ||
| 80 | 72 | 64 | 56 | ||
| 85 | 74 | 66 | 58 | 50 | |
| 90 | 76 | 68 | 60 | 52 | |
| 95 | 78 | 70 | 62 | 54 | |
| 100 | 72 | 64 | 56 | ||
| 105 | 74 | 66 | 58 | ||
| 110 | 76 | 68 | 60 | ||
| tyre size - clincher | ||||
|---|---|---|---|---|
| 25c | 28c | 30c | 32c | 34c |
| 79 | 66 | 57 | 48 | 40 |
| 81 | 68 | 59 | 51 | 42 |
| 84 | 70 | 62 | 53 | 44 |
| 86 | 73 | 64 | 55 | 46 |
| 88 | 75 | 66 | 57 | 48 |
| 90 | 77 | 68 | 59 | 51 |
| 92 | 79 | 70 | 62 | 53 |
| 95 | 81 | 73 | 64 | 55 |
| 97 | 84 | 75 | 66 | 57 |
| 99 | 86 | 77 | 68 | 59 |
| 101 | 88 | 79 | 70 | 62 |
| 90 | 81 | 73 | 64 | |
| 92 | 84 | 75 | 66 | |

Please observe the maximum tyre pressure! Failure to do so could result in fatal or serious injury. This wheel system has been developed to support the latest in tubeless technology, centred around sizes 25-34mm. Tire manufacturers recommendations should also be taken into consideration, but the user should always be limited by the lower value.
Any use other than the intended use can lead to accidents resulting in serious injury or fatality. The partington.cc R39/44 Wheelset is designed solely for:
- Installation on disc brake specific road bicycles using 12mm threaded through axles.
- For use on sealed, paved or asphalt surfaces.
- For installation of 700c clincher or tubeless specific tyres that comply with European Tyre & Rim Technical Organisation standards.
Riding a bicycle always involves potential danger to both the rider and others around. Even with the proper use of approved safety devices and equipment, accidents resulting in injury or death can occur. Acknowledge these risks and be conscious of these risks and ride within the ability of yourself and those around you. Do not overestimate your technical ability!
Risk of accident through damaged wheels
Avoid riding through potholes, over curbs, steps, rough edges or compromised road surfaces. Check your wheels regularly for damage — particularly the outer perimeter of the rim which is most susceptible to impact damage. If any dents, cracks, large areas of abrasion or other abnormalities are present, then contact us direct at: contact.us@partington.com.au to arrange an inspection.
Never ride damaged wheels. Do not continue to use your bike after a serious crash, before getting the whole bike inspected by the respective manufacturers and receiving conformation that your equipment is without damage, and safe to use.
Be aware of your own technical ability. The hubs are the only serviceable part(s) outside of the factory, but even here, good technical competence and prior experience is essential. Follow only partington.cc service instructions. Servicing the hubs inside warranty should only be completed by a partington.cc approved Partner.
Clean and inspect wheels regularly. Clean with only light detergents. For more stubborn residues such as tar, the frugal use of isopropyl alcohol is permitted. Never use a pressure washer or steam system to clean your wheels. Use light dedicated bicycle cleaning detergents only. Ensure the disc brake rotors are not contaminated during any cleaning. If in doubt, source a dedicated disc brake cleaning product from your local bike store.
STORAGE & TRANSPORTYour wheels are designed to be exceptionally strong in-service for as-intended use. However, they are still vulnerable to abuse and improper storage. The sidewalls of the rim are of highly-ordered carbon fibre, but very thin (~0.2mm at its thinnest) and supported by a structural foam material. This offers a high-performance solution for its intended application but is vulnerable to point loads and contact damage. When transporting or storing your bike/wheels, ensure suitable padding is used to provide a soft interface and an even distribution of load. If packing wheels side-by-side, avoid contact or penetration of the spaces between the spokes by the disc rotor, free-hub or cassette bodies. Such interference will likely cause damage to the spokes. Do not store your wheels with ambient temperatures above 60° Celsius.
Installing a cassetteThe freehub body on your wheels can be changed in the event of a group set system change; i.e. from Shimano/SRAM 11s to SRAM XDR to Campagnolo and visa versa. Ensure that your cassette complies with the freehub body type of your rear wheel.
Shimano 11s freehub body can have a 10, 11 or 12 speed cassette installed but 10speed must be installed with a 1.9mm spacer provided with the cassette.
SRAM XDR freehub body is only suited to SRAM XDR cassettes.
Ensure your rear derailleur is properly adjusted and in good alignment. Particular attention should be made to ensure the derailleur does not interfere with the wheel spokes when shifted into the largest cassette sprocket. NOTICE! Ensure there is a minimum of 2mm clearance between the derailleur and closest spoke
Ensure your rear derailleur is properly adjusted and in good alignment. Particular attention should be made to ensure the derailleur does not interfere with the wheel spokes when shifted into the largest cassette sprocket. NOTICE! Ensure there is a minimum of 2mm clearance between the derailleur and closest spoke
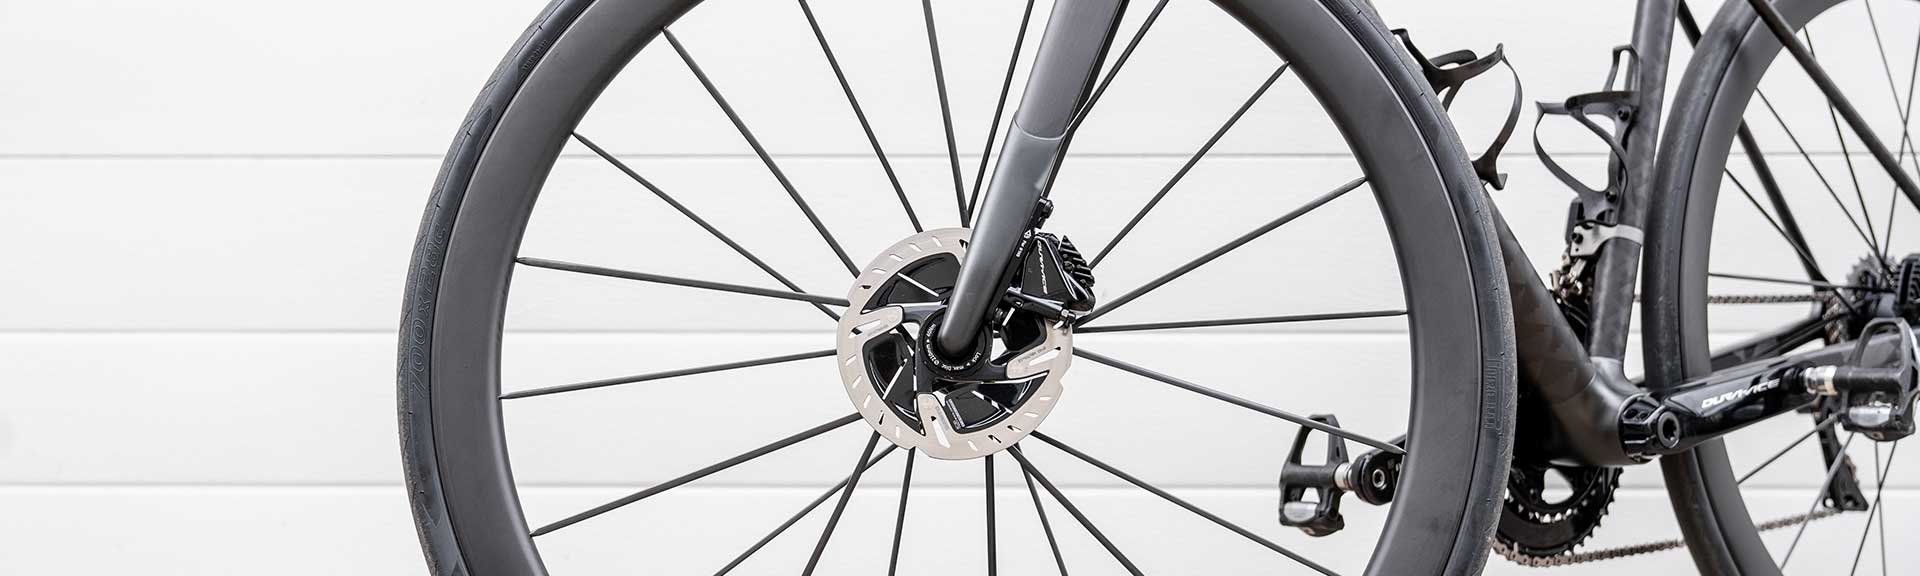
Only use disc rotors from credible manufacturers
Only use ‘external drive’ type disc rotor lock rings
Follow the instructions from the manufacturer when installing your disc brake rotors Tighten to the manufacturers recommended tightening torque, but do not exceed 40 Nm!
Do not exceed the maximum tightening torque of 40 Nm
Ensure the proper rotor size and calliper mount is being installed.
Ensure the calliper is properly centered on the disc rotor. Retracting the pads fully will give best visibility of calliper centering
It is essential that proper installation is performed. Ensure there is a minimum of 2mm clearance between the brake calliper and closest spoke. Some variation in mating components (forks, callipers, and smaller disc rotors) may cause this clearance to become marginal. Please contact: contact.us@partington.com.au or your vendor if further support is required.
Your wheels have been optimised for tubeless use and will come with a tubeless valve stem assembled. This stem can be removed if the user wishes to install an inner tube as per traditional clincher format, however, please observe the following:
- Use only the retaining nut supplied with the tubeless valve stem. Tighten only lightly by fingers.
- Take care in both removal and re-installation of the valve stem and do not use any tools or implements to pry the valve stem or inner tube stem from the rim.
- Use only supplied tubeless valve stems. Replacements are available by contacting sales@partington.com.au
Never exceed the maximum approved inflation pressure of either the wheel or tyre
Use only tubeless specific or tubeless ready tyres that are free from damage and/or excessive wear.
Never use tools or a tyre lever to mount the tyre onto the rim. We recommend the use of a quality approved tyre soap when installing tyres. Use only wide, flat plastic tyre levers to aid removal of the tyre. Do not use metal levers under any circumstances!
Use a dedicated tubeless pump to inflate and bead your tubeless tyre making certain that you do not exceed the maximum recommended tyre or wheel pressure. Tyre soap will aid the ‘seating’ of your tire if troublesome.
Once seated, release all pressure, and remove the valve stem core.
Inject 30-50ml of tyre sealant through the valve stem, then re-insert the valve stem core and inflate to ~3bar/40psi
Gyrate the wheel/tyre assembly to distribute the sealant throughout the interior of the rim and tyre. Effort should be made to bring sealant to the tyre bead rim interface to ensure a good seal.
Finally, continue inflating to your desired pressure.
Clean off any tyre sealant residue immediately.
INSTALLING TYRES > CLINCHERNever exceed the maximum approved inflation pressure of either the wheel or the tyre.
Carefully remove the tubeless valve stem and store in a safe place. Retain the retaining nut to secure your inner tube stem.
Never use tools or a tyre lever to mount the tyre onto the rim. We recommend the use of a quality approved tyre soap when installing tyres. Use only wide, flat plastic tyre levers to aid removal of the tyre. Do not use metal levers under any circumstances!
Observe minimum and maximum pressures of both the tyre and the wheel. Follow only the highest minimum or lowest maximum described on both wheel and tyre together.
IN EVENT OF DAMAGE OR ACCIDENTPlease contact us by email contact.us@partington.com.au before shipping us your damaged or defective wheels. When returning a defective wheel, please pay for all postage. Any shipment not paid for will be returned to sender.
When returning an item for a warranty claim, please remove all accessory items not included with your purchase or subject to the warranty claim including tyres, tubes, cassettes, axles, etc. We cannot be responsible for loss or damage to accessory.
REGISTER YOUR WHEELSET
To qualify for the Partington 2-Year Manufacturer Warranty and the Partington Multi-Year Crash Replacement Program, it is required that you register your Partington MKII or Partington R-Series wheel / wheelset. Registration should occur at the time of purchase (original retail purchase). Please work with your appointed Partington retailer to ensure your wheel / wheelset is registered before you leave the store. "Original retail purchase" means the product was purchased new for the first time from us directly or from an authorised Partington retailer.
WHAT YOU NEED TO REGISTERTo register your Partington MKII or Partington R-Series wheel / wheelset, you will require the following information:
- Proof of Purchase (PDF or image/photo).
- Partington MKII / R-Series wheel serial numbers (these are located on the inner rim of your wheels).
- Partington appointed retailer details (address).
- Your address and contact details.
If you require any assistance registering your Partington MKII or Partington R-Series wheel / wheelset, please contact us via the Contact Us form on the website and we will be happy to help with any questions you have.
PLEASE NOTERegistration of Partington MKII or Partington R-Series wheel / wheelset only applies to original owners who have purchased their wheel / wheelset via an authorised Partington retailer. Partington wheels purchased outside of authorised Partington retailers cannot be registered.
WARRANTY POLICY
Partington provides a 2-year warranty in respect of the original retail purchase for all partington.cc products which covers material and manufacturing defect. During this period all products accepted as being faulty or defective will be repaired or replaced at no cost.
This two year period of liability starts from the date of the original retail purchase.
Liability does not extend to any damage caused by normal wear and tear, accidents, accidental damage – including damage in transit, unauthorized modifications, negligence or improper handling of the product. Any repair work carried out by persons outside of partington.cc will void the warranty.
"Original retail purchase" means the product was purchased new for the first time from us directly or from an authorised Partington retailer.
Please be aware this warranty is non-transferable and applies only to the original purchaser.
It is not valid for any subsequent owners or transferees of the product. Subject to your rights under the Australian Consumer Law or any equivalent and applicable consumer laws in the jurisdiction in which our products are sold, this warranty only applies to products that are manufactured by us and intended and authorised for sale to the public.
- To be eligible the Partington wheelset must be registered on the Partington website at time of purchase.
- The Partington Warranty Policy only applies to the original owner of the wheelset.
- The Partington wheelset must be purchased from a Partington Retailer by the original owner.
- The Partington Warranty Policy commences from the date of the purchase and registration of the Partington wheelset by the original owner.
- If the wheel required for replacement is no longer made, Partington will replace it with the most similar product in our range.
- Partington reserves the right to repair a Partington MKII or Partington R-Series wheel / wheelset submitted under the Warranty Policy, instead of replacing it.
- If the Partington MKII or Partington R-Series wheel / wheelset required for replacement is no longer made, Partington will replace it with the most similar product in our range.
- Only original owners who purchased the Partington wheelset at a Partington retailer can submit a Warranty claim.
Original owners will be required to:
- Access the Partington website and locate the Partington Warranty Form.
- Complete the Warranty form.
- Upload the original owner proof of purchase from a Partington Retailer.
- Ensure the Partington wheelset was registered by the original owner at the time of purchase at www.partington.cc.
MULTI-YEAR CRASH REPLACEMENT PROGRAM
At Partington we offer a Multi-Year Crash Replacement Program to original owners of Partington wheels / wheelsets. If you're an original owner of a Partington MKII or Partington R-Series wheel / wheelset, and you are involved in a crash/accident, we will help you get back to riding your bike.
WHAT CAN CAUSE DAMAGE TO YOUR WHEELSETThe following are examples of how a Partington MKII or Partington R-Series wheel / wheelset may be damaged (these are examples and are not exhaustive):
- You hit an object while riding your bike.
- You are involved in a crash/accident while riding your bike on the road.
If you are involved in a crash/accident while riding your Partington wheelset, we recommend that you immediately stop riding your bike and visit your Partington retailer to assess whether or not your wheelset has been damaged.
YOUR ENTITLEMENTYour entitlement under Partington's Multi-Year Crash Replacement Program is determined as follows:
- During the First year of ownership, a qualifying wheel / wheelset will be replaced or repaired free of charge to the original owner.
- During the Second year of ownership, a qualifying wheel / wheelset can be replaced or repaired at 50% off the MSRP to the original owner.
- During the Third year of ownership, a qualifying wheel / wheelset can be replaced or repaired at 40% off the MSRP to the original owner.
- During the Fourth year of ownership, a qualifying wheel / wheelset can be replaced or repaired at 30% off the MSRP to the original owner.
- During the Fifth year of ownership, a qualifying wheel / wheelset can be replaced or repaired at 20% off the MSRP to the original owner.
- After the Fifth year, the Partington Multi-Year Crash Replacement Program no longer applies, and any replacement or repair will be solely at your cost.
The discount offered is based on the MSRP of the Partington MKII or Partington R-Series wheel / wheelset. Prices of wheel / wheelset may vary by location and are subject to change. Repairs to wheel / wheelset are at the sole discretion of Partington.
IMPORTANT- The Partington Multi-Year Crash Replacement Program does not include shipping costs, duties, tariffs or handling fees, which are the responsibility of the original owner making the claim.
- It is important you register your Partington MKII or Partington R-Series wheels at the Partington website at the time of purchase. Failure to do so may exclude you from this program.
- The Partington Multi-Year Crash Replacement Program does not carry on or apply to any repaired or replacement wheels supplied under this program, and may only be applied for once in respect of each original purchase.
- To be eligible, the Partington wheelset must be registered on the Partington website at the time of purchase.
- The Partington Multi-Year Crash Replacement Program only applies to the original owner of the Partington wheelset.
- The Partington wheelset must be purchased from an authorised Partington Retailer by the original owner.
- The Crash Replacement Program only applies to Partington MKII wheels / wheelsets purchased from 1st January 2023, and Partington R-Series wheels / wheelsets purchased from 1st June 2026.
- The Partington Crash Replacement Program only applies to wheel / wheelset damaged while riding and does not apply to wear and tear or damage that occurred in transit or transport.
- Partington MKII and R-Series wheels / wheelsets are intended for use on tarmac roads. The Partington Crash Replacement Program is void for incidents occurring on unpaved surfaces or gravel roads.
- The Partington Crash Replacement Program commences from the date of purchase and registration of the Partington wheelset by the original owner.
- If the Partington MKII or Partington R-Series wheel / wheelset is not registered on the date of purchase, it will not qualify for the Partington Crash Replacement Program.
- The Partington Crash Replacement Program does not re-start when a wheel / wheelset has been replaced under the program.
- Partington reserves the right to repair a Partington MKII or Partington R-Series wheel / wheelset submitted under the program, instead of replacing it.
- If the Partington MKII or Partington R-Series wheel / wheelset required for replacement is no longer made, Partington will replace it with the most similar product in our range.
- Partington reserves the right to deny coverage if we determine at our discretion that the Crash Replacement Program is being abused.
Criteria:
- Only original owners who purchased the Partington wheelset at an authorised Partington retailer can submit a Crash Replacement claim.
Process:
Original owners will be required to:
- Access the Partington website (www.partington.cc) and locate the Partington Crash Replacement form.
- Complete the Crash Replacement form.
- Upload proof of purchase from an authorised Partington Retailer.
- Ensure the Partington wheelset was registered by the original owner at the time of purchase at www.partington.cc.
- Supply all information required by Partington to review the claim.
Partington will review and assess the information submitted by the original owner, cross-check against any previously collected information, and advise whether or not the Partington MKII or Partington R-Series wheel / wheelset qualifies under the Crash Replacement Program. If the wheel / wheelset qualifies, Partington will determine whether it can be repaired or if it needs to be replaced.
COMMUNICATIONSThe original owner will receive communication at the following stages:
- When the Crash Replacement Program claim has been submitted.
- When a decision has been made by Partington on the submitted wheel / wheelset.
- When there is a cost relating to repair or replacement on a qualifying claim, including any shipping, duties, tariff or handling costs payable.